Sweet Inspiration and Culinary Adventures!
Showing posts with label Birthday. Show all posts

Wednesday, December 12, 2012

Celebrate people, young and old


Typically every year I make a birthday cake for a cousin of mine.  Well, cousin once removed, or second cousin.  What is a child of your first cousin?  Family trees can be confusing. 

She celebrated her third birthday this year, which means Disney themes are in high demand.  Who am I kidding, I would love a Little Mermaid cake, you never outgrow Disney.  However, they do seem slightly more appropriate when you aren’t approaching 30.


Speaking of 30, I also have the great pleasure of living in the same city as my older sister.  I have so much fun every year planning her birthday festivities, including the cake!  This year she requested a winter themed cake, fitting for December.  All white with clear sugar crystals.  Done.

Wednesday, August 1, 2012

The Classic Peanut Butter and Jelly


Today is Jerry’s birthday!

How shall we celebrate?  The festivities kick off today and end with a big finish Saturday night.  A special home cooked meal is planned for this evening, dinner out on Friday and the birthday party with all of our friends Saturday.  I cannot wait!

I wanted to make a dessert that was totally off the wall.  Something unique and creative, but also screamed Jerry.  I had to think long and hard on this one.  He loves bananas, but I’m already making him a two tiered cake on Saturday; the top tier is banana cake (stay tuned for photos and recipes!).  I found myself asking what else does he love?  Then it dawned on me, he loves peanut butter sandwiches.  It took enough thinking to get to this point, that I had to look for inspiration for the actual cake elsewhere.  It just so happened that I was flipping thru the Food Network Magazine two days later and happened upon a cake that looks exactly like a giant peanut butter and jelly sandwich.  Brilliant!

He doesn’t typically make the traditional PB&J sandwich.  However, I couldn’t make this cake without the jelly – it wouldn’t be the same.  While I drew my inspiration from his favorite sandwich, I am going back to the traditional, well-loved classic.

Happy Birthday, Jerry!  

Adapted from Food Network Magazine

Prep Time: 25 min
Cook Time: 30 min

Ingredients
  • 1 stick European style unsalted butter, at room temperature
  • All purpose flour for the pan
  • 1 box white cake mix, or your favorite homemade recipe
  • 1 cup creamy peanut butter
  • 1 1/2 - 2 cups confectioners' sugar
  • 2 to 3 tablespoons milk
  • 3/4 cup your favorite jelly, or 2 to 3 cups your favorite fruit
Directions
Butter or spray a 9-inch-square cake pan, line with parchment, then butter or spray again and dust with flour. Make the cake batter and fill the pan three-quarters full. Bake at 350 degrees F until a toothpick comes out clean, 30 to 35 minutes.
Let the cake cool in the pan 10 minutes, then turn out onto a rack and let cool completely. Transfer the cake to a work surface. Trim off the top using a serrated knife, then slice the cake in half horizontally.
Beat the butter and peanut butter with a mixer until smooth. Alternate adding the confectioners' sugar and milk, beating after each addition, until the frosting is fluffy and smooth. In another bowl, whisk the jelly until it is loose and spreadable.  If you are using whole fruit, blend with an immersion blender until smooth.
Spread a thick layer of peanut butter frosting on the bottom cake half.
Spread the jelly or fruit on top of the peanut butter frosting, making sure to reach the edges. Top with the remaining cake layer.
Cut the cake in half diagonally and transfer to a serving plate. Separate the halves slightly to show the filling.

Fluffy Vanilla Cake
Yield: One 2-layer, 8-inch round cake or one 2-layer, 8-inch square cake
Adapted from Classic White Cake recipe on Baking Bites

Ingredients
5 large egg whites, at room temperature
3/4 cup whole milk, at room temperature
2 1/4 teaspoons pure vanilla extract
2 3/4 cups cake flour, sifted 
1 3/4 cups sugar
1 tablespoon + 1 teaspoon baking powder
3/4 teaspoon salt
12 tablespoons unsalted butter, at room temperature and cut into cubes

Directions
Preheat oven to 350°F. Grease, line with parchment, and flour two round 8-inch pans, or one square pan.

In a medium bowl or measuring cup, combine and stir the egg whites, 1/4 cup of milk, and the vanilla. Set aside.

In the bowl of an electric mixer fitted with the paddle attachment, combine the dry ingredients together on low speed for 30 seconds.

Add the butter and remaining 1/2 cup of milk, and mix on low speed until just moistened. Increase to medium speed and mix for 1 1/2 minutes.

Scrape the sides of the bowl and begin to add the egg mixture in 3 separate batches; beat on medium speed for 20 seconds after each addition.

Divide the batter in two, if using two round pans.  Fill the pans 3/4 full.

Bake 25-35 minutes or until a cake tester comes clean when inserted into the center. Be so careful to not over bake. Let cool on racks prior to removing from pan.

Wrap tightly and store at room temperature for up to 2 days, refrigerator for up to 5 days, or frozen for up to 2 months. Best eaten the same day as baked.


Thursday, March 15, 2012

Salted Caramel? Yes, please!


Celebrating another birthday, my specialty.  I wanted to do something unique and fun.  I decided to branch out and try a new recipe – Salted Caramel Chocolate Cupcakes.  Whoa.  – Happy Birthday, L!

As usual, I started with massive amounts of research.  I never try a recipe unless I trust the source, it received rave reviews or just looks too good to pass up.  For this recipe, the one I found looked way too good to pass up and I was right!

This was my first attempt at homemade caramel.  It was interesting to make – and involved a candy thermometer, something I had never used before.  Very straightforward though, heat the sugar, water and corn syrup.  After the heating process is over you add the heavy cream.  I was very surprised at what happened next, maybe even a little shocked.  Adding the cream to the heated mixture creates a boiling, hissing effect, very strange if you’ve never experienced it before!  I thought for a few seconds I had ruined my batch of caramel.  Wrong, turned out perfectly.  I was stunned at how easy it was and how delicious it turned out.  I think I’ll be adding caramel to more of my baked goods in the future.  Yum. 
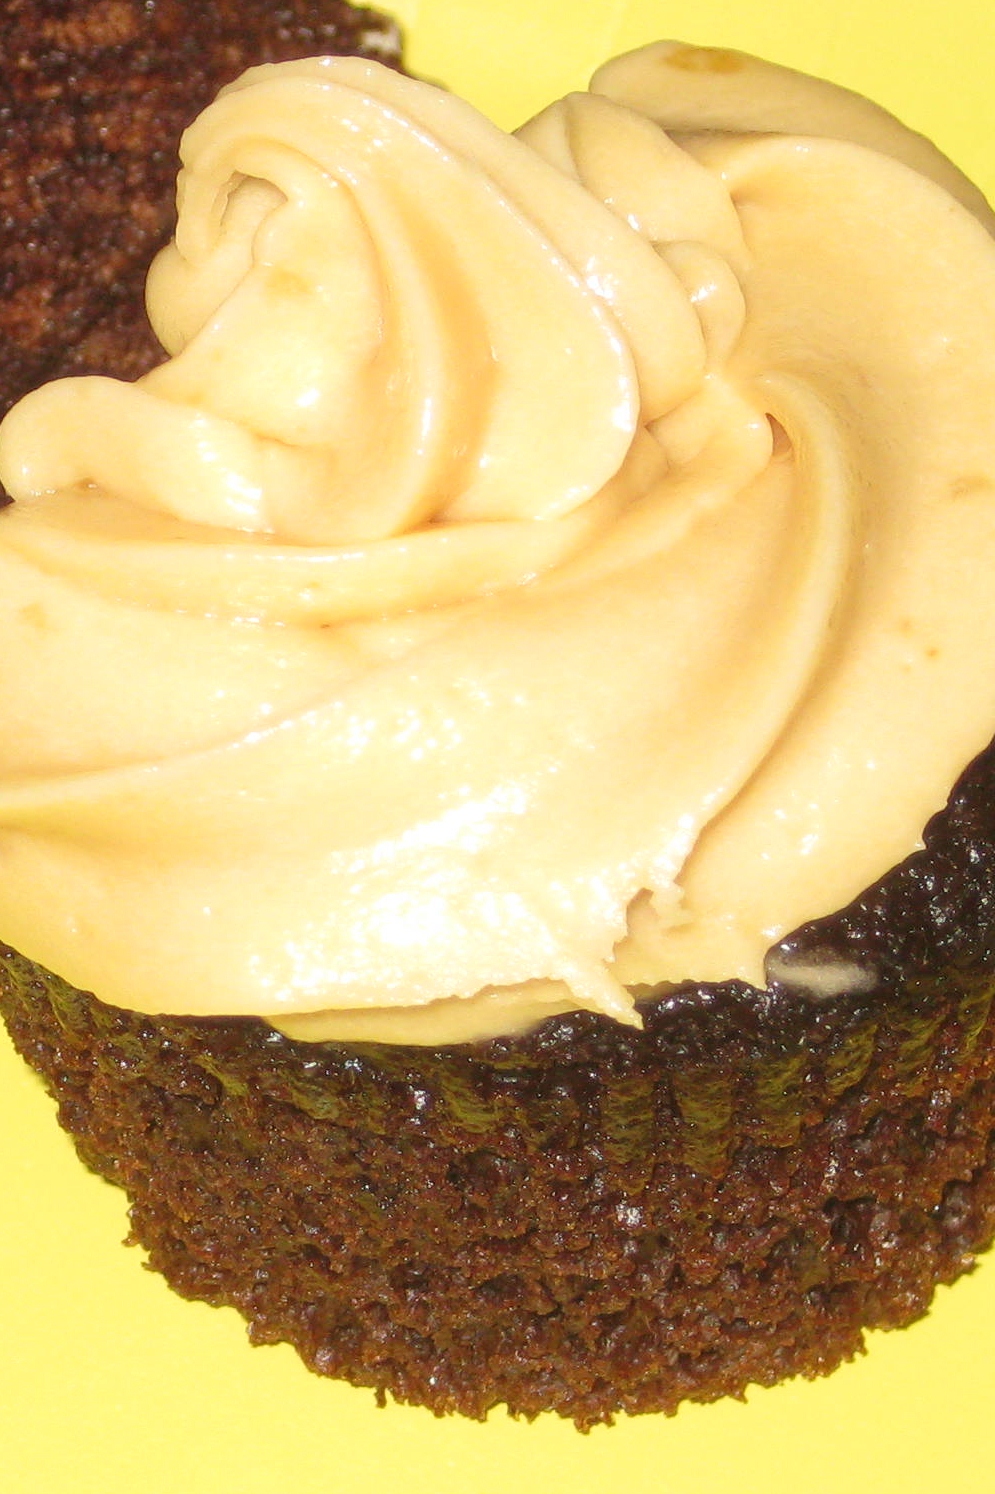
After scooping out the middle of each cupcake, I filled them with the caramel.  The caramel sinks in, so I went around a second time and added more.  I still had leftover caramel.  May as well take this cupcake over the top and make a salted caramel buttercream to top off each cupcake.

Moist chocolate cupcakes with a  center filled with salted caramel, topped with a salted caramel buttercream.  Seriously.  These cupcakes were better than I could have imagined.  The perfect birthday treat.


Chocolate Cupcakes
Adapted from Martha Stewart

  • 1 1/2 cups all-purpose flour
  • 3/ cup unsweetened Dutch-process cocoa powder
  • 1 1/2 cups sugar
  • 1 1/2 teaspoons baking soda
  • 3/4 teaspoon baking powder
  • 3/4 teaspoon salt
  • 2 large eggs
  • 3/4 cup buttermilk
  • 3 tablespoons vegetable oil
  • 1 teaspoon pure vanilla extract
  • 3/4 cup warm water
  • Salted Caramel Filling, recipe below
Preheat oven to 350 degree F.  Line muffin tin with paper liners.  Whisk together flour, cocoa, sugar, baking soda, baking powder and salt.  With mixer on low speed, add eggs, buttermilk, oil, extract and the water; beat until smooth and combined.

Spoon the batter into liners about two-thirds full.  Bake approximately 15-17 minutes, or until tester comes out clean.  transfer tins to wire racks and allow to cool for 10 minutes; turn cupcakes onto racks and let cool completely.  Cupcakes can be stored overnight at room temperature, or frozen up to 1 month in air tight containers.

Use a pairing knife to cut a cone-shaped piece (about 1/2 inch deep) from the center of each cupcake and throw away the pieces.  Make the salted caramel.

Salted Caramel
  • 2 1/2 cups sugar
  • 2/3 cup water
  • 1 tablespoon light corn syrup
  • 3/4 cup heavy whipping cream
  • 1 1/2 teaspoons flaked sea salt (or coarse sea salt)
Heat sugar with the water and corn syrup in a heavy saucepan over medium-high heat, stirring occasionally, until syrup is clear; clip a candy thermometer to side of pan and stop stirring.

Cook until syrup comes to a boil, washing down the sides of a pan with a wet pastry brush as needed.  Boil, gently swirling pan occasionally, until mixture is caramelized and just reaches 360 degrees F.  Remove from heat and slowly pour in cream; stir with a wooden spoon until smooth.  Stir in sea salt.

Let cool for about 15 minutes; if caramel begins to harden reheat gently until it reaches a pouring consistency.  Spoon 1 to 2 teaspoons warm caramel into each hollowed-out cupcake.  The caramel will slightly sink into the cupcake - just add more.  Sprinkle a pinch of sea salt over filling.

Use the leftover caramel for the frosting.

Salted Caramel Buttercream Frosting
  • 2 sticks unsalted butter *European style
  • 1/2 teaspoon flaked sea salt
  • 1 teaspoon vanilla extract
  • 4+ cups powdered sugar
  • 1/2 cup leftover caramel sauce from above
Caramel should now be cool enough to use for the frosting.  Make sure it's slightly warm to the touch and still able to be poured.  If it's hardened too much, gently reheat until able to pour.

In a mixer fitted with paddle attachment, beat butter and salt together until lightened and fluffy.  Reduce speed to low; add powdered sugar and vanilla.  Mix until thoroughly combined.

Scrape down the side of the bowl and add the caramel.  Beat on medium-high speed for a few minutes until light and airy, and completely mixed.  If the frosting looks like it needs to set, refrigerate for 15 minutes.  The caramel wavers between too warm or too thick if it is too cool.  This will affect the frosting.  If you need stiffer frosting, add more confectioner's sugar.

Use a pastry bag with a medium star tip and pipe frosting onto each cupcake.  Garnish each cupcake with a pinch of sea salt.  

Store at room temperature.  Makes approximately 21 cupcakes.

Sunday, January 15, 2012

A Birthday Celebration


I've said it many times and will say it again, I love celebrating birthdays!  They are such a joyful time and being able to contribute to make it a special day is absolutely amazing.  I recently was asked to make a cake for a 2nd birthday.  It doesn't get much better than that!  


Winnie the Pooh was on order.  It was an expedited cake, so there wasn't much time to prepare.  I wanted to do several characters but only had time to do Pooh himself.  I made a tree and a honey pot to liven the cake up.


Chocolate cake with chocolate buttercream was requested.  I adapted a recipe from http://bakingbites.com/2005/04/cooking-school-white-cake-and-buttercream/


This was a really fun cake - it was the first cake I made where I created characters with fondant.  I also received rave reviews from the family I made it for!
"I had to hide the cake and cut him a very small peace so he doesn't finish it! I am not a cake person! I HAVE HAD 3 pieces! IT SO FREAKIN' DELISH! THANK YOU for making our little person's special day even more special!!!!!"


Fluffy Chocolate Cake


Ingredients
5 large egg whites
1 cup milk
2 1/4 teaspoons pure vanilla extract
3/4 cup cocoa powder
2 1/2 cups cake flour, sifted
1 3/4 cups sugar
1 tablespoon + 1 teaspoon baking powder
3/4 teaspoon salt
12 tablespoons unsalted butter at room temperature (I used Kerrygold to amp up the flavor of the cake)


Directions

  1. Preheat oven to 350 degrees F.  Line 8 x 3 inch cake pan with parchment, grease and flour pan.
  2. In a medium bowl combine and stir the egg whites, 1/4 cup of milk and the vanilla.  Set aside.
  3. In the bowl of an electric mixer, fitted with the paddle attachment, mix the dry ingredients together on low speed for 30 seconds.
  4. Add the butter and remaining 3/4 cup of milk, and mix on low speed until just moistened.  Increase to medium speed and mix for 1 1/2 minutes.
  5. Scrape the sides of the bowl and begin to add the egg mixture in 3 separate batches; beat on medium speed for 20 seconds after each addition.
  6. Pour the batter into the prepared cake pan.
  7. Bake one hour and ten minutes, or until cake tester comes out clean.  Let cool on wire rack.

Chocolate Buttercream

Ingredients
1 1/2 stick unsalted butter, room temperature (I use Kerrygold Pure Irish Butter)
1/2 cup unsweetened cocoa powder
1/2 teaspoon salt
2 1/4 cups powdered sugar (I typically use more than this to achieve the consistency I need)
1 teaspoon pure vanilla extract
2 tablespoons milk
1/2 cup heavy cream
1/3 cup Ovaltine

Directions
Cream together butter, cocoa powder and salt.  Butter mixture will be extremely thick. Turn off the mixer, scrape down the sides of the bowl and add powdered sugar one cup at a time.  Turn mixer on low and mix in powdered sugar while adding milk and vanilla extract.  Beat until smooth.  Mix together heavy cream and Ovaltine.  Turn mixer speed to medium and pour cream mixture into the frosting in a slow, steady stream.  More powdered sugar may be added or less of the cream and Ovaltime to reach your desired consistency.

Wednesday, December 14, 2011

Birthday Celebrations


I absolutely love birthdays.  We commemorate how wonderful the gift of life is and all the joy it brings.  Nothing more makes me happier than getting to share in someone’s birthday celebration.  As I’ve grown as a baker, this usually involves me making a cake or cupcakes to bring to the party.  After all, everyone must make a birthday wish, and you can’t do that without a cake or cupcake to put the candle in!

This month I’ve had the honor of making two very special birthday cakes, both for family members.  The first cake was for a first birthday party.  Minnie Mouse was the theme!  I can’t think of a more fun theme for a first birthday.  An absolute blast to make!  All hands on deck for this cake.  I had my dad help me with the power tools.  Yes, power tools in the kitchen!  After fully washing, of course, we drilled holes into the cake boards and cake to insert a dowel rod for extra support.  This was quite the experience! 

For the ultimate introduction to sugar, chocolate cake with chocolate buttercream.  Yum.  This was made for the “smash” cake the birthday girl dug into.  I made a tiered cake for the rest of the party goers to enjoy.  Two layers were chocolate with whipped Oreo filling and the third was chocolate with a chocolate peanut butter ganache filling.  So delicious.

The second cake I had the privilege of making was for my dear sister.  


She wanted something classic but with an edge.  We decided on a black tiered cake, but miniature, with tiny roses made of fondant as an accent.  The roses really pop against the black fondant.  She wanted the cake to look sexy, so we went with chocolate cake with chocolate buttercream.  The reviews were outstanding.  I was even asked at the restaurant where we purchased the cake.  I was happy to tell the wait staff that I had made it.  What a compliment!

Happy Birthday B!!

Monday, October 10, 2011

I LOVE Birthdays.

Happy Birthday!

Today is my birthday, so we had to have cake to celebrate. 

My lovely sister wanted to make me a birthday cake.  I have been wanting to make a cupcake house (adapted from Wilton) for ages.  What better time than for my own birthday!  With my assistance, my sister crafted this amazing birthday cake for my birthday celebration.  We used a white wedding cake recipe for the batter and my traditional, signature buttercream frosting.  B was in charge of dying the frosting.  I haven’t quite mastered colors!  She always has to tell me when I’ve hit the color I’m shooting for, I’m not sure why this is so difficult for me.  The doors and windows were the hardest part.  I piped them on, and she smoothed them down to make them look like actual  doors and windows.  They turned out fabulous!  I think I’ll hire her full time as my color expert and window/door shaper. 


The trickiest part was assembling the house.  Using a dowel rod, we slid the small cupcake on top of the larger one, being careful not to completely ruin all of the work we just did!  B spread the pink frosting on top of each cupcake as the roof.  Sprinkles added a little something special, as did the candied dots on the window and door trim.   To finalize the house, grass was added.  I think this is my favorite cake I’ve made so far.  It is too cute!

Thanks B for your help and wanting to make me a fabulous cake!  And thanks to my very good friends who joined me on Saturday for a pre-birthday celebration.  Dinner, drinks and birthday cake.  What could be better?!  The celebration was one to remember, and I know there are only more to come!